
make your own plinths
ever wondered how to make your own plinths, but don’t know where to start.
well i have a very simple how to guide for those with minimal tools.
its quick, its easy and you can even do it on your dining room table.
so for all you diy couples out there, this one is for you…enjoy!!
(recommend light objects to be placed on top. anything heavy will need thicker wood).
Tools
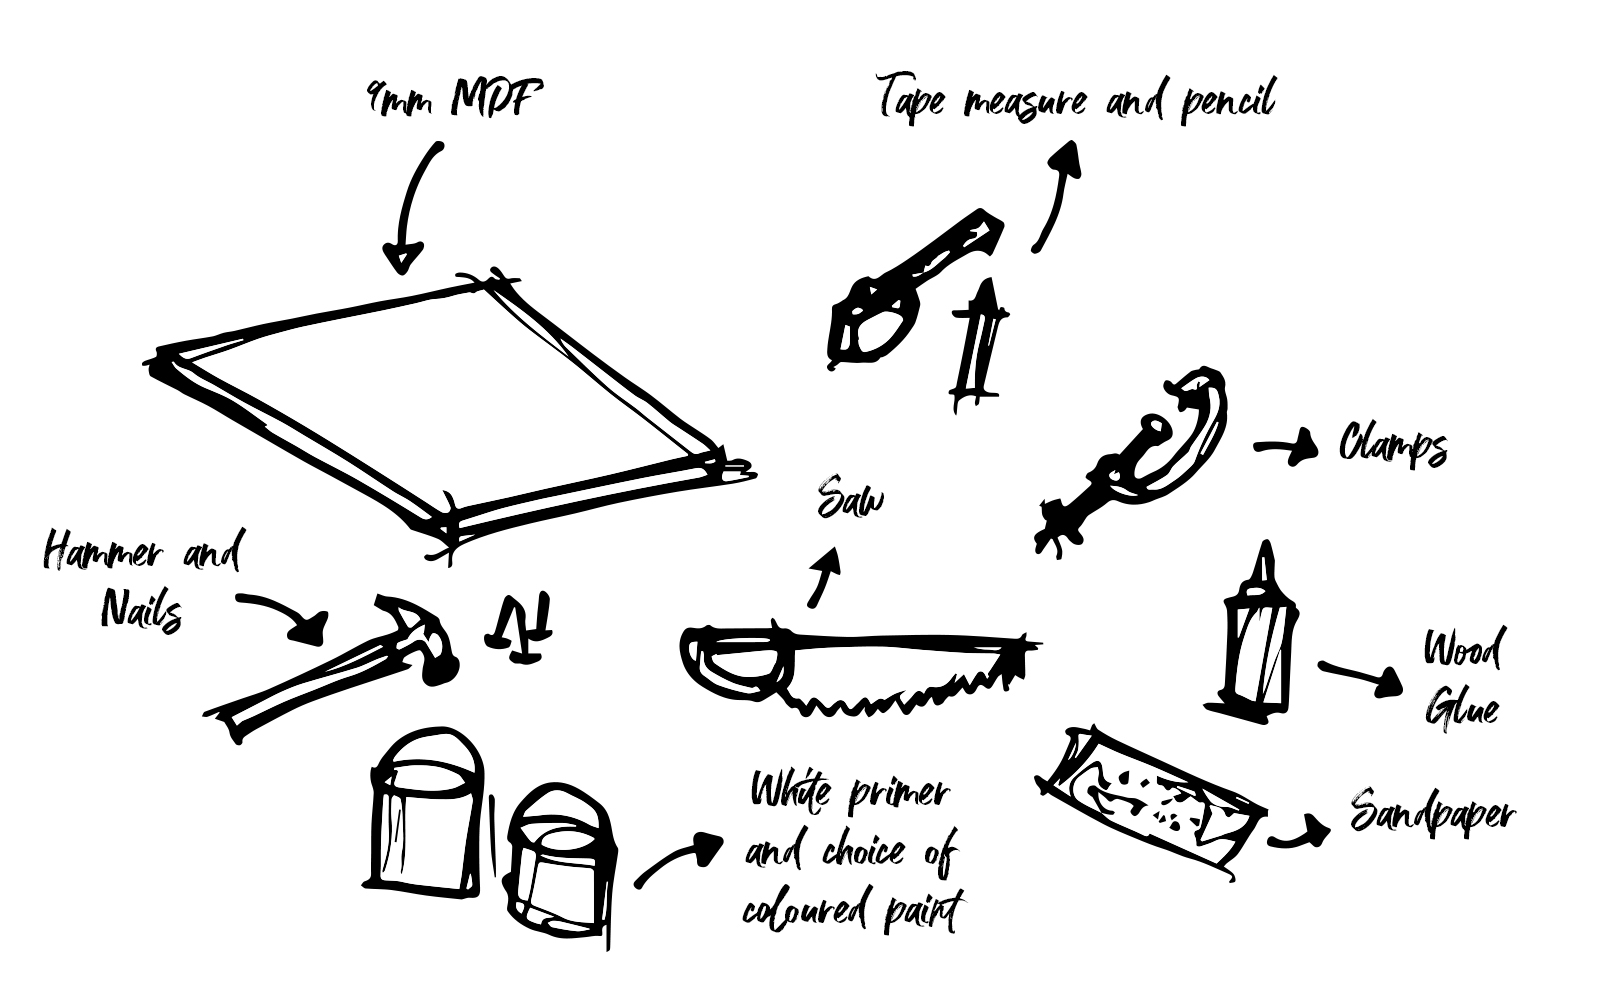
Measure
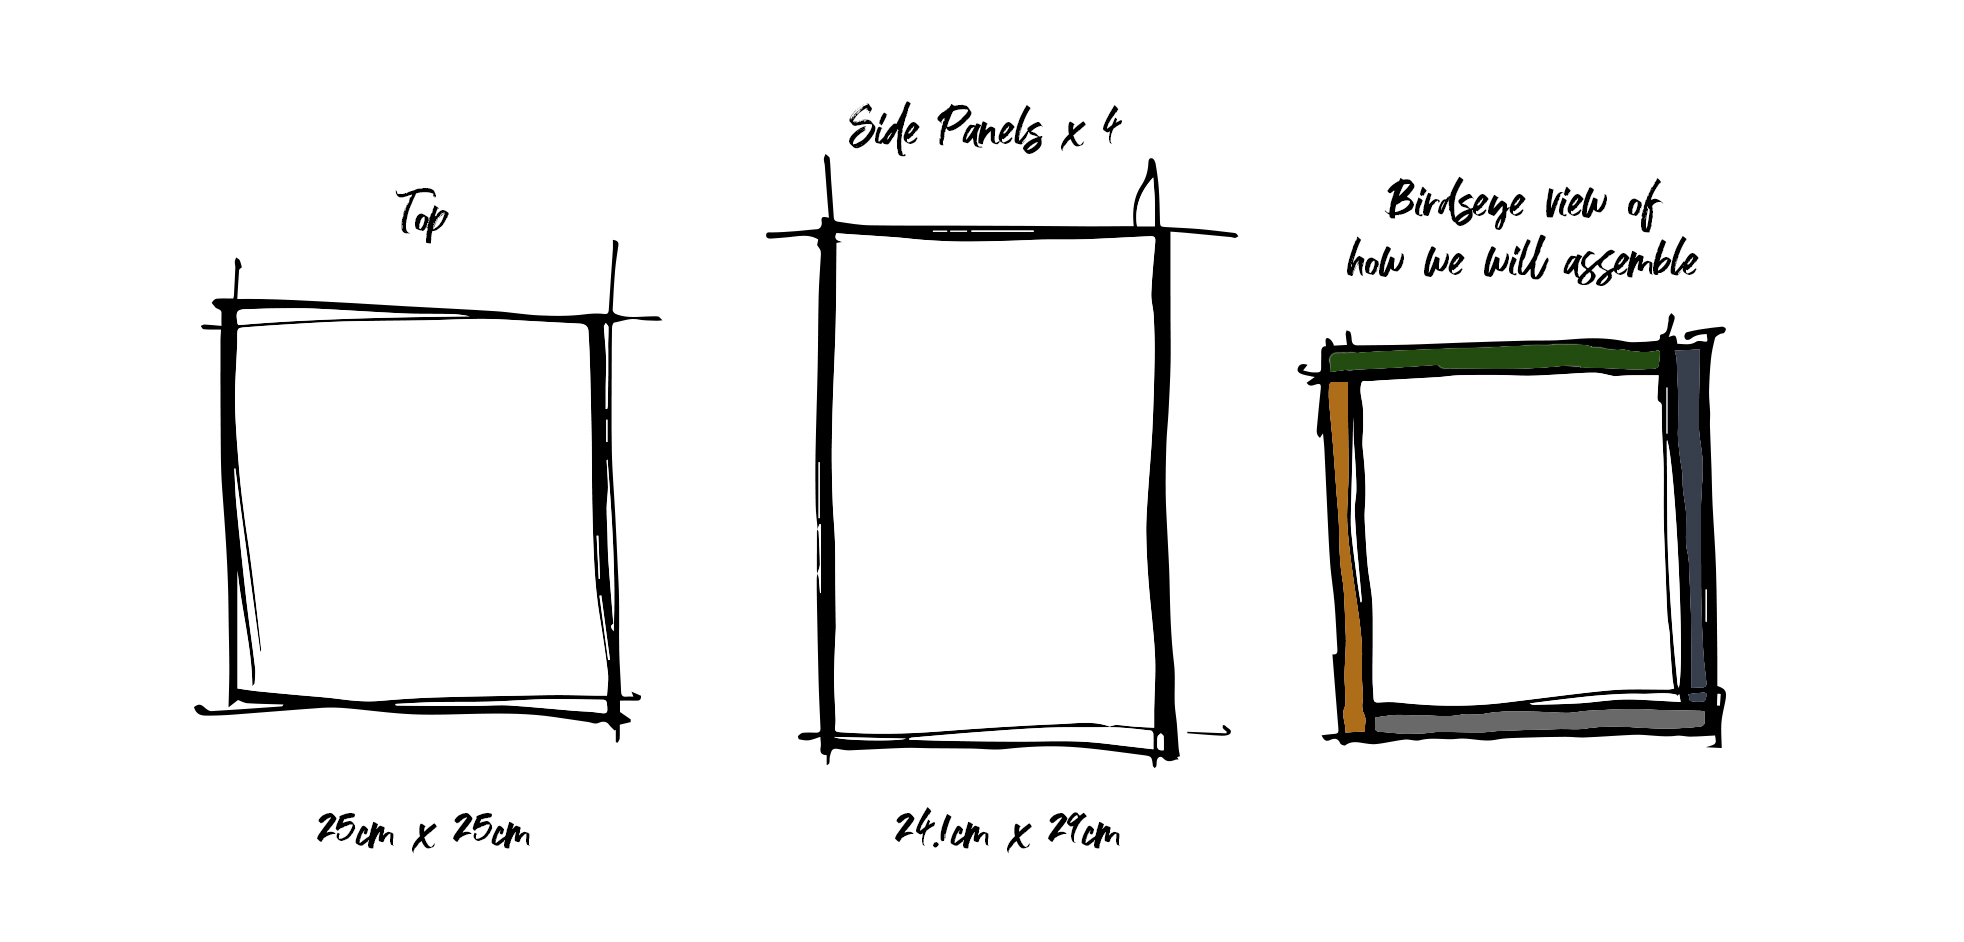
firstly work out how big you want your plinth.
my example is : 25 x 25cm top and 38cm high
as we are using 9mm mdf, we need to take away 9mm from the short
and long edges of the side panels.
this is due to the way we will be fixing the boards together.
Cut
1 – make sure that floor areas and any furniture is covered to avoid them getting ruined.
2 – clamp your mdf to a work bench or table, making sure your cut line is away from table…
you don’t want a line cut out off your furniture do we.
3 – saw in a straight line, following your measurements and cut all your 5 pieces out.
4 – once cut, make sure you sand all the sides and edges to make them smooth.
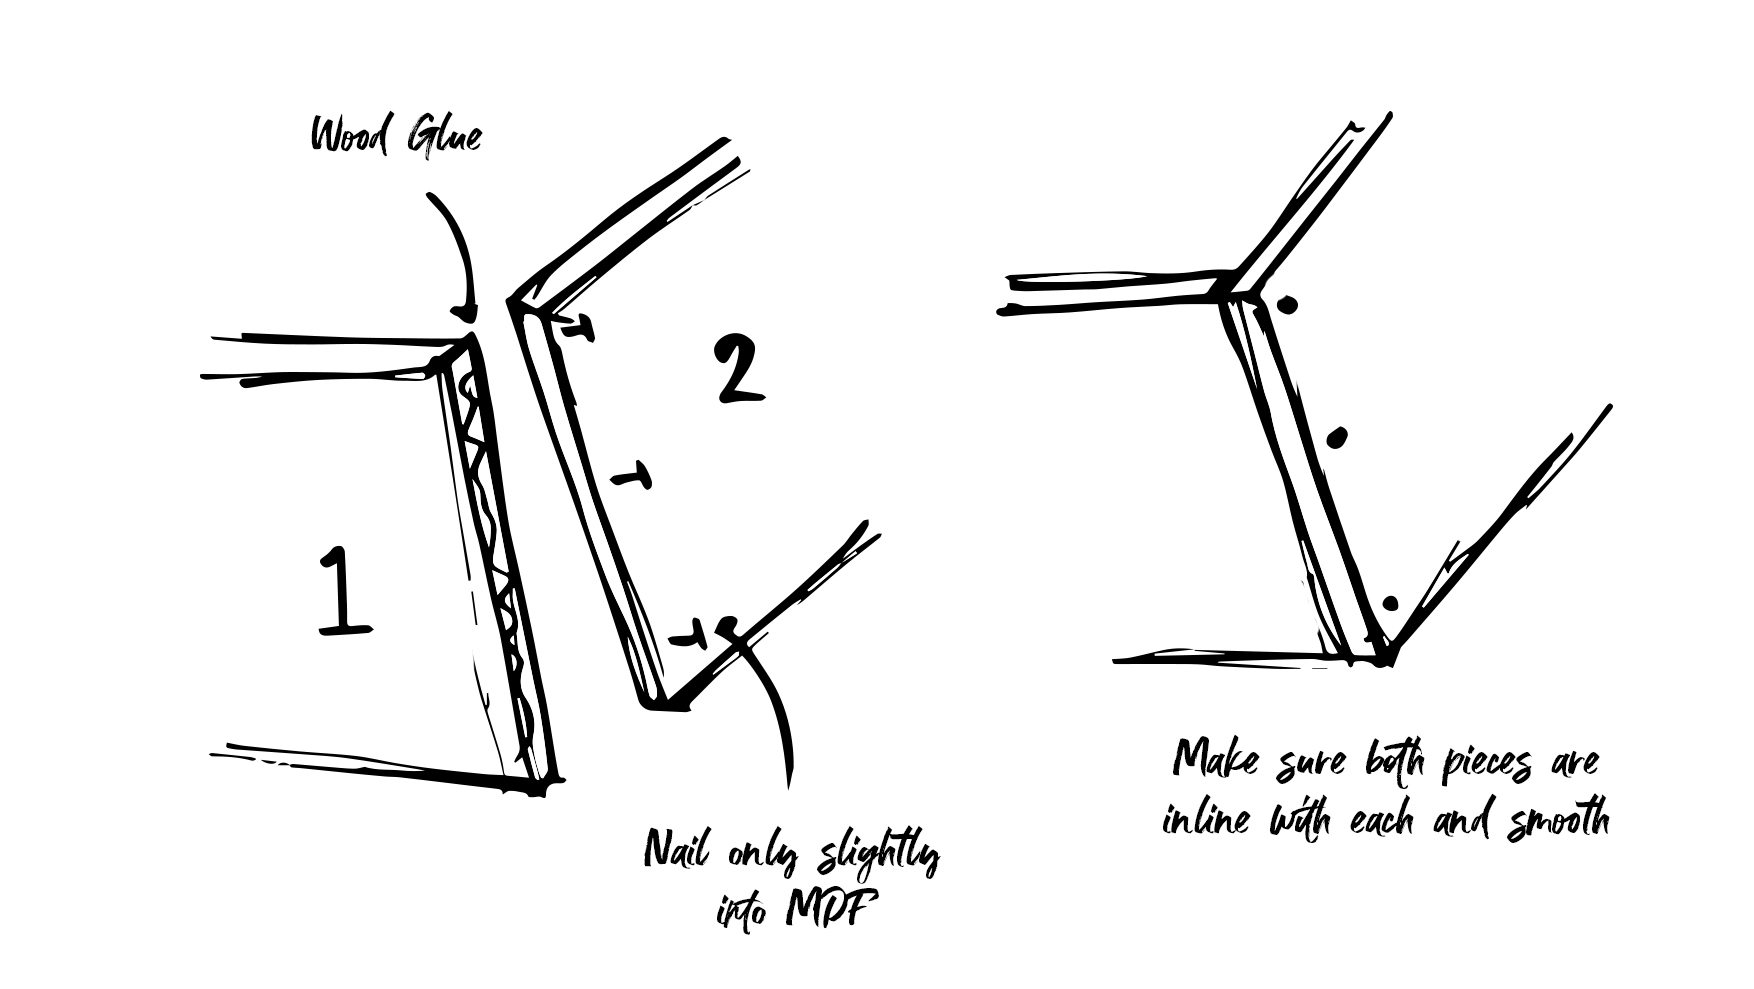
Assemble
1 – grab a side panel and glue down one long edge.
2 – grab a second side panel and nail in (only slightly) 3 nails into the mdf.
3 – clamp your glued panel into a workbench or table to hold it up
4 – line up the nailed panel onto the glued edge and then hammer. making sure the wood is still inline.
5 – repeat this with all 4 side panels to make a cube.
6 – when all are nailed together give it another sand to make sure all is smooth and inline with each other.
7 – glue along the top of all the side panels ready to place your top lid on.
8 – position the top panel onto the top and nail.

Paint
1 – prime your mdf with white.
2 – let is dry and then add your chosen colour.
3 – let is dry and boom…you are done!